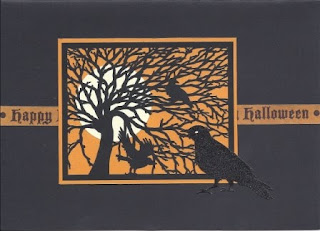
Halloween, the name stirs up so many emotions but mostly the right to get dressed up and act downright silly no matter what age you are. I don't go for costumes, just cards! When I started working on my Halloween cards earlier this year I found wonderful stickers and embellishments, but nothing really jumped out at me as much as two lonely pieces of paper from "Creative Imagination". I don't know if these were left over from last year or I just got to the store late, but I only found one piece of each and I grabbed them. These papers were perfect and were strong enough to hold their own and not need a whole lot of additons to create the perfect Halloween cards.

The first one was a combination of purple and black that just "screamed" manly Halloween scarry things! I used just the one upper corner (the only spot that had a third color - the brilliant orange glow from within the grinning black sull) and side of the paper and I'm saving the rest for future use. The text is a 3D sticker from "Recollections" in the same brilliant orange and black combination as the skull. I mounted the paper panel on black paper and adhered the whole thing vertically on a letter size purple card.

The second one's base paper is orange and black. The orange background is crisscrossed with a square grid while the black background is broken with bright flourishes. I extended the flourish theme with 3D orange and black stickers from "Recollections" and a 3D sticker texted tag from "Target". I mounted the printed panel on black paper and then adhered all the panels horizontally to an orange letter size card. Oh yes, I added rhinestones in the pumpkins eyes for a little added oomph These cards were simple to make, are very biffiting of the season and best of all scarry enough to suit anybody! Happy Halloween to all and to all a scarry night!


 The first one was a combination of purple and black that just "screamed" manly Halloween scarry things! I used just the one upper corner (the only spot that had a third color - the brilliant orange glow from within the grinning black sull) and side of the paper and I'm saving the rest for future use. The text is a 3D sticker from "Recollections" in the same brilliant orange and black combination as the skull. I mounted the paper panel on black paper and adhered the whole thing vertically on a letter size purple card.

.jpg)

.jpg)
